Описание мода All-U-Want Inventory Editor. Функциональные возможности мода All-U-Want Inventory Editor
All-U-Want Mod Minecraft is a mod that works like a very famous mod, .However, when you are looking for an inventory editor, All-U-Want Mod seems to be the better one. What can you do with this mod?
- access any items in the game and give your player that item
- allow you to create custom items
- enchant a weapon up to any level you want.
Screenshots and Tutorials:
(TL;DR: open your inventory and push ‘r’ over an inventory slot to open the GUI)
First, put your mouse on the inventory slot you want items in, then push ‘r’ to open this GUI. You can use this to give yourself new items or change values on existing items. The slot you just selected is now at the top left of the screen.
Click on the item you want on the left to select it, and it will appear in the slot on the top left. To see the rest of the items click on the arrows in the bottom left. You can also search for items by typing their name in the “search” box. I clicked on the sponge block.
 Now you can modify the sponge. Find out how to modify items in the other spoilers. Once you’re done modifying the sponge, click “save”. The sponge is now in your inventory! If you don’t like the changes you made to that slot, press “cancel” or the escape key and your inventory won’t change.

If you want to give yourself more (or less) sponges, type the number of sponges you want in the “stack count” box. The slot on the top left now has the amount of sponges you chose.
 You can enter numbers less than 1 and more than 64, but the items might act weird.Certain attributes of items are controlled by their damage value, like wool color, tool and armor durability, and wood type. There are two ways to change the damage value of the item you want to give yourself. You can enter a number in the “damage” box or you can click on the buttons with numbers on them at the bottom of the screen. This is useful for potions. Here is select wool, than enter the number 14 for red.

If you want your item to have a custom name, just type they custom name into the “item name” box.
 If you want your item to have text on multiple lines, you can use lore text. For the first line of lore text, type the text you want in the “lore line” box. If you want more lines click on the right arrow next to the “lore line” box and type more text. To go back to previous lines click the left arrow. To remove a line click “remove line”.


The repair cost controls how much it costs to rename or repair something in an anvil. It gets bigger every time you repair something. To change the repair cost, type it into the “repair cost” box. The repair cost won’t be visible on an item until you use it in an anvil.

If you put a piece of leather armor in the slot at the top left, a new text box will pop up called “armor color in hex”. To change the color of the armor put a hex color value in that box. Use google to find the color you want if you don’t know how hex colors work.

To give yourself player heads with player names, first give yourself a head. If you use the mod, they’re on the last page and named “head”. Once it’s in the slot at the top left, a new text box will appear called “player head name”. Type the exact name of the player you want to have the head of. The damage will change to 3 because it needs to for the player name to work.

If you have a written book and you want to change the author or name of the book, two text boxes will appear named “author” and “title”. Change these to change the author and name of the book.
 To edit the contents of the book, either change the id in the “item id” box to 386 or pick “Book and Quill” from the item selection (second to last page). Then click “save” and you can edit the book again. When you want to sign it again re-enter the author and title.

Enchantments:
To add enchantments to an item, select the item by putting it in the slot at the top left, then push the “enchantments” button. Select an enchantment from the list at the left, choose the enchantment’s level with the “enchant level” text box at the right, and click “add enchant”. The enchantment will be added to the list. You can add as many enchantments to the list as you want, because the list scrolls. To remove an enchantment, click on it, then click “remove enchant”. When you’ve added all the enchantments you want click “done”.

 Enchantment levels can be between -32768 and 32767.
To get custom enchantment books, first give yourself a blank one (“Enchanted Book”, last page, id 403). A button will appear called “book enchants”. When you click on it you will see the same GUI for regular enchantments; it works the same way. Note: you can give yourself enchanted books with any enchantments but sometimes anvils will cap them

To get a potion with potion effects, just find the one you want on pages 6-8.If you want even better effects though, click on a potion then click the “custom potions” button. To add a potion effect, first select the effect you want on the left, then enter the potions level in the “strength” box and the potions duration in the “duration” box. The time is in ticks, where 20 ticks = 1 second (1000 ticks = 50 seconds). Then, click “add” to add the potion effect to the list. You can have unlimited potion effects, since the list scrolls. If you want to remove a potion effect, click on it then click “remove”.

 If you want to modify something about a potion effect like it’s duration or level, click on it then click “edit”. The “edit” button now says “done”, and now the text boxes have the values of that effect and the effect that it uses is selected on the left. You can change the numbers in the text boxes and which effect on the left is selected then click “done” (NOT “save”) and the potion effect in the list will be changed. Here I change the 100 ticks to 1000 ticks.

 Potion levels can go from -128 to 127 (what do negative ones do?) and durations can go up to 2,147,483,648.
Tutorial coming soon, until then click on the “Firework Rocket” (last page, id 401), click “fireworks”, and see what all the buttons do.
colored and formatted text:
In order to do formatted text, you need to type a §. On windows hold alt then type 0167 on the numeric keypad, on mac hold option then type 6. Or you can just push the “§” button in the GUI. Here are all the color and format codes, except use § instead of &: http://ess.khhq.net/mc/ For example, if I type §bBlue into the “item name” box, the items name will be blue. It will also show up blue in the text box.

If you make a really cool item with tons of enchantments and firework explosions and lore text, and you don’t want to have to make it over again every time you go into a new world or server, you can put it in the favorites list. To put an item in the favorites list, select it so it’s in the slot at the top left, then click “save favorite” in the middle of the screen. The item is now in your favorites list. You can add unlimited items to the favorites list, because the list scrolls. If you select the item from the favorite list and click “use”, the item in the slot at the top left will get replaced by the favorite item. If you click “delete”, the item will be removed from the favorite list. Here’s the best part: items you put in the favorites list stay there until you delete them, even after you quit minecraft! They are saved to a config file.

Video:
All-U-Want Mod Installation Guide:
- Make sure you have .
- Download All-U-Want Mod file from link(s) below
- Go to Start menu. Type: %appdata%/.minecraft. Press Enter to Run %appdata%/.minecraft
- Go to minecraft/modsfolder. If Mods folder does not exist, create one
- Put Mod file into the mods folder
- Launch Minecraft using Forge Profile, then Open Menu
All U Want Mod for Minecraft. To begin with this mod adds such a creative environment which allows you to create and edit any item you desire. Also it grants an option to attach custom attributes, custom names and much more than that. Most Noteworthy that it will alter the every single aspect of entity which is such a joy to have. In conclusion it is a remarkable tool to edit inventory.
Additionally this tool can be used in a creative multiplayer. Moreover, it grants an option to rename the items according to your desire. Hence it is proven to be such a delight to have in your mod list and some of the updates will contains more extra ordinary features.
All U Want Mod for Minecraft
For Minecraft 1.10.2/1.9.4 – Please be patient. Available after release.
For Minecraft 1.7.10
| Release Date: | 21st September, 2014 |
| Version | 2.1 |
| File Size: | 335.22 KB |
| Supported version: | Minecraft 1.7.10 |
| mister_person | |
| Download (Direct):
Download (Dev): |
How to install All U Want Mod for Minecraft:
Every mod requires Minecraft Forge API installed beforehand. Forge creates a new profile in Minecraft launcher and enables 3rd party modification without breaking core files of the game. So, download Forge API latest build for your game version. It comes with installer, just run it and start game to complete installation.
Now download the mod file using the link present in the page. It must be supporting your current game version.
Start Minecraft, click “Edit profile” and then click “Open Game Dir”
Open the “mods” folder (it gets automatically created when you run the game using Forge).
Drag and Drop the mod file into the mods folder.
Start Minecraft, select Forge profile from Drop-down menu and run the game.
Forge will take time to configure and then start your game with the mods.


In conclusion these mods are available right here are purely from the developers itself. In addition to that we always take real good care of the source as well. Therefore, its our humble request to please inform the MinecraftYard team, if you find any broken or not working link. We will make sure that its fixed within few hours. Additionally we don’t provide fake links or disguise the fans.
First, put your mouse on the inventory slot you want items in, then push ‘r’ to open this GUI. You can use this to give yourself new items or change values on existing items. The slot you just selected is now at the top left of the screen.
Click on the item you want on the left to select it, and it will appear in the slot on the top left. To see the rest of the items click on the arrows in the bottom left. You can also search for items by typing their name in the “search” box. I clicked on the sponge block.
Now you can modify the sponge. Find out how to modify items in the other spoilers. Once you’re done modifying the sponge, click “save”. The sponge is now in your inventory! If you don’t like the changes you made to that slot, press “cancel” or the escape key and your inventory won’t change.
Stack count and damage:
If you want to give yourself more (or less) sponges, type the number of sponges you want in the “stack count” box. The slot on the top left now has the amount of sponges you chose.You can enter numbers less than 1 and more than 64, but the items might act weird.Certain attributes of items are controlled by their damage value, like wool color, tool and armor durability, and wood type. There are two ways to change the damage value of the item you want to give yourself. You can enter a number in the “damage” box or you can click on the buttons with numbers on them at the bottom of the screen. This is useful for potions. Here is select wool, than enter the number 14 for red.
Name and lore text:
If you want your item to have a custom name, just type they custom name into the “item name” box.If you want your item to have text on multiple lines, you can use lore text. For the first line of lore text, type the text you want in the “lore line” box. If you want more lines click on the right arrow next to the “lore line” box and type more text. To go back to previous lines click the left arrow. To remove a line click “remove line”.
Repair cost:
The repair cost controls how much it costs to rename or repair something in an anvil. It gets bigger every time you repair something. To change the repair cost, type it into the “repair cost” box. The repair cost won’t be visible on an item until you use it in an anvil.Leather armor color:
If you put a piece of leather armor in the slot at the top left, a new text box will pop up called “armor color in hex”. To change the color of the armor put a hex color value in that box. Use google to find the color you want if you don’t know how hex colors work.Player heads:
To give yourself player heads with player names, first give yourself a head. If you use the mod, they’re on the last page and named “head”. Once it’s in the slot at the top left, a new text box will appear called “player head name”. Type the exact name of the player you want to have the head of. The damage will change to 3 because it needs to for the player name to work. If you have a written book and you want to change the author or name of the book, two text boxes will appear named “author” and “title”. Change these to change the author and name of the book.To edit the contents of the book, either change the id in the “item id” box to 386 or pick “Book and Quill” from the item selection (second to last page). Then click “save” and you can edit the book again. When you want to sign it again re-enter the author and title.
Enchantments:
To add enchantments to an item, select the item by putting it in the slot at the top left, then push the “enchantments” button. Select an enchantment from the list at the left, choose the enchantment’s level with the “enchant level” text box at the right, and click “add enchant”. The enchantment will be added to the list. You can add as many enchantments to the list as you want, because the list scrolls. To remove an enchantment, click on it, then click “remove enchant”. When you’ve added all the enchantments you want click “done”.All-U-Want Mod 1.7.10 allows you to give yourself almost every possible item in the game, including: Fireworks with any amount of explosions and custom colors, potions with potion effects up to level 127, any enchantment on any item up to level 32767, and custom item names with colors and formatting. All-U-Want Mod can give you more items than can.
Screenshots and Tutorials:
(TL;DR: open your inventory and push ‘r’ over an inventory slot to open the GUI)
First, put your mouse on the inventory slot you want items in, then push ‘r’ to open this GUI. You can use this to give yourself new items or change values on existing items. The slot you just selected is now at the top left of the screen.

Click on the item you want on the left to select it, and it will appear in the slot on the top left. To see the rest of the items click on the arrows in the bottom left. You can also search for items by typing their name in the “search” box. I clicked on the sponge block.

Now you can modify the sponge. Find out how to modify items in the other spoilers. Once you’re done modifying the sponge, click “save”. The sponge is now in your inventory! If you don’t like the changes you made to that slot, press “cancel” or the escape key and your inventory won’t change.

If you want to give yourself more (or less) sponges, type the number of sponges you want in the “stack count” box. The slot on the top left now has the amount of sponges you chose.

You can enter numbers less than 1 and more than 64, but the items might act weird.Certain attributes of items are controlled by their damage value, like wool color, tool and armor durability, and wood type. There are two ways to change the damage value of the item you want to give yourself. You can enter a number in the “damage” box or you can click on the buttons with numbers on them at the bottom of the screen. This is useful for potions. Here is select wool, than enter the number 14 for red.

If you want your item to have a custom name, just type they custom name into the “item name” box.

If you want your item to have text on multiple lines, you can use lore text. For the first line of lore text, type the text you want in the “lore line” box. If you want more lines click on the right arrow next to the “lore line” box and type more text. To go back to previous lines click the left arrow. To remove a line click “remove line”.


The repair cost controls how much it costs to rename or repair something in an anvil. It gets bigger every time you repair something. To change the repair cost, type it into the “repair cost” box. The repair cost won’t be visible on an item until you use it in an anvil.

If you put a piece of leather armor in the slot at the top left, a new text box will pop up called “armor color in hex”. To change the color of the armor put a hex color value in that box. Use google to find the color you want if you don’t know how hex colors work.

To give yourself player heads with player names, first give yourself a head. If you use the mod, they’re on the last page and named “head”. Once it’s in the slot at the top left, a new text box will appear called “player head name”. Type the exact name of the player you want to have the head of. The damage will change to 3 because it needs to for the player name to work.

If you have a written book and you want to change the author or name of the book, two text boxes will appear named “author” and “title”. Change these to change the author and name of the book.

To edit the contents of the book, either change the id in the “item id” box to 386 or pick “Book and Quill” from the item selection (second to last page). Then click “save” and you can edit the book again. When you want to sign it again re-enter the author and title.
To add enchantments to an item, select the item by putting it in the slot at the top left, then push the “enchantments” button. Select an enchantment from the list at the left, choose the enchantment’s level with the “enchant level” text box at the right, and click “add enchant”. The enchantment will be added to the list. You can add as many enchantments to the list as you want, because the list scrolls. To remove an enchantment, click on it, then click “remove enchant”. When you’ve added all the enchantments you want click “done”.

Enchantment levels can be between -32768 and 32767.
To get custom enchantment books, first give yourself a blank one (“Enchanted Book”, last page, id 403). A button will appear called “book enchants”. When you click on it you will see the same GUI for regular enchantments; it works the same way. Note: you can give yourself enchanted books with any enchantments but sometimes anvils will cap them
To get a potion with potion effects, just find the one you want on pages 6-8.If you want even better effects though, click on a potion then click the “custom potions” button. To add a potion effect, first select the effect you want on the left, then enter the potions level in the “strength” box and the potions duration in the “duration” box. The time is in ticks, where 20 ticks = 1 second (1000 ticks = 50 seconds). Then, click “add” to add the potion effect to the list. You can have unlimited potion effects, since the list scrolls. If you want to remove a potion effect, click on it then click “remove”.

If you want to modify something about a potion effect like it’s duration or level, click on it then click “edit”. The “edit” button now says “done”, and now the text boxes have the values of that effect and the effect that it uses is selected on the left. You can change the numbers in the text boxes and which effect on the left is selected then click “done” (NOT “save”) and the potion effect in the list will be changed. Here I change the 100 ticks to 1000 ticks.

Potion levels can go from -128 to 127 (what do negative ones do?) and durations can go up to 2,147,483,648.
Tutorial coming soon, until then click on the “Firework Rocket” (last page, id 401), click “fireworks”, and see what all the buttons do.
colored and formatted text:
In order to do formatted text, you need to type a §. On windows hold alt then type 0167 on the numeric keypad, on mac hold option then type 6. Or you can just push the “§” button in the GUI. Here are all the color and format codes, except use § instead of &: http://ess.khhq.net/mc/ For example, if I type §bBlue into the “item name” box, the items name will be blue. It will also show up blue in the text box.

If you make a really cool item with tons of enchantments and firework explosions and lore text, and you don’t want to have to make it over again every time you go into a new world or server, you can put it in the favorites list. To put an item in the favorites list, select it so it’s in the slot at the top left, then click “save favorite” in the middle of the screen. The item is now in your favorites list. You can add unlimited items to the favorites list, because the list scrolls. If you select the item from the favorite list and click “use”, the item in the slot at the top left will get replaced by the favorite item. If you click “delete”, the item will be removed from the favorite list. Here’s the best part: items you put in the favorites list stay there until you delete them, even after you quit minecraft! They are saved to a config file.
Намного круче и функциональнее дополнения TooManyItems, которым вы привыкли пользоваться в режиме администратора на любом из серверов игры Minecraft или в одиночной игре с друзьями. All-U-Want Inventory Editor позволяет настраивать для каждого отдельного блока или предмета свои уникальные характеристики, например, вы теперь сможете выбрать зелье с наибольшим уровнем и временем действия, зачаровать супер кирки или мечи с остротой 10 или 20. Возможности этого мода просто безграничны!
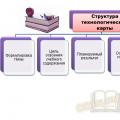
Функциональные возможности мода All-U-Want Inventory Editor
Структура и интерфейс этого мод во многом схожа с описанным выше, однако у него намного больше возможностей, да и в настройке он гораздо удобнее. На первое время игроку может показаться все не таким, как он привык видеть, но после 10 минут использования он не сможет перейти на другие дополнения подобного типа. И так, что же мы имеем? Вы сможете также получать любые предметы в игре Minecraft, в любом количестве, сможете переключать фазы дня и ночи, настраивать быстрый доступ к определенным предметам и блокам, менять их параметры.
Конкретнее о параметрах и настройках мода All-U-Want Inventory Editor. Теперь для любого предмета или вещи можно будет назначить модификаторы, например, повысить взрывоустойчивость, предметам выдать определенные характеристики нанесения ударов или повысить скорость. Если ваша версия игры позволяет использовать фейерверки, то для каждого из них можно будет назначить неограниченное количество взрывов, определенный колорит цветов и многое другое! Для каждого зелья может быть назначен эффект до 127 уровня. Вы только представьте себе, какую разрушительную силу или целительный эффект будет иметь такая бутылочка. Ведь в стандартной версии Minecraft максимальное зелье имело уровень 2!

Вы теперь сможете менять названия предметов и их внешний вид, при этом система не будет выдавать ошибок. Каждый игрок на сервере сможет видеть ваши измененные блоки, использовать их. Если вы удалите мод, то все ранее созданные блоки и вещи останутся, никуда не исчезнут. Это дополнение работает практически со всеми модами, которые есть только для игры Minecraft. То есть, вы сможете менять характеристики практически любой модификации, будь то Industrial Craft 2 или Gulliver Mod.
 Технологическая карта урока как инновационный инструмент реализации фгос роговцева наталья ивановна, к
 Жанна д’Арк: героиня или грандиозный пиар-проект?
 Лекции по "архитектуре кубани" Общественно сословный и архитектурный облик кубанских городов